Well, it has been years since I used this, but someone reminded me that I can more easily share my creative endeavors with a blog, & I remembered - "Oh yeah, I have one of those."
<Blows dust off>
So I am today sharing my newest creation. I have made jewelry in the past, & got a wild hair to make a box to put it in. 🙂 Please let me know if you found this interesting or useful. If you have any crafty questions, please don't hesitate to ask. I plan on posting my different crafty bits up here frequently, as I find sharing my endeavors helps keep me more accountable.
This particular box is actually a wedding gift for my dear friends Sarah & Michelle. May you both live long and prosper. 😙
 |
| This is how the box originally appeared. Simple, slightly rough wood, shiny brass fixings. I do not yet have the tools to make a box myself... that's going to have to wait till I have a garage. |
 |
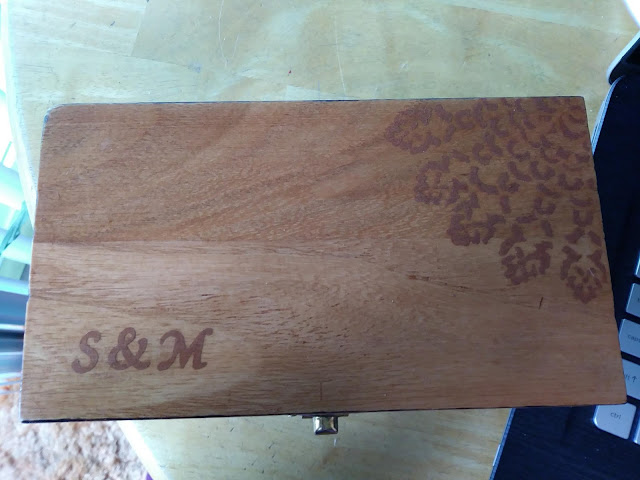
| This is the back after completion. I aged the brass fixtures with a mixture of vinegar and salt. The filigree design is from a stencil, with red & gold acrylic paint (the shimmer of the gold would not come through on the pictures) |
 |
| The wedding date is burned into the lid interior. The interior of the box is stained with a teal wood dye, so the grain is still visible, and the bottom is lined with patterned felt. |
 |
| This is the lid. The design in the corner wraps around to the back, as seen in the above picture. After the paint was applied, I used a light pecan stain, and two layers of polyurethane. I was worried that the stain & sealant would completely cover the design, but it actually seems to have brought it out into a higher relief. |
 |
| I lightly burned all the exterior edges of the box - I feel this gives it an older feel. The final touch was adding the metal feet, which are beautiful, but the most annoying part of the whole project. :) They didn't come with attaching brads, so I used ones from the hardware store, which I feel were too long. The bottom of the box is also covered in the same patterned felt, which also goes over where the feet were nailed into the box, covering the fact that the brads don't match the feet. :) |
No comments:
Post a Comment