Showing posts with label crafty. Show all posts

Tuesday, October 24, 2017

Purse Revamp

I have a new addiction. I wandered down a crafty rabbit hole, and landed at http://www.epbot.com/
So much crafty goodness! Well, I decided to take an evening, and try one of her tutorials. Specifically, this one:  
http://www.epbot.com/2016/04/diy-transforming-purse-is-last-bag.html
It looked so... me. So, I went to Ross, and found the perfect bag to upgrade:


Isn't it perfect? The vinyl is so similar to the fabric I used on my tail that I had to put a scrap of that in the shot for comparison. The only problem is, I don't like the strap. It's stupid thin, and had a buckle and was super annoying. So, following the tutorial, I got rid of it!


I tried to take "during" photos, but the evening light in the kitchen is so yellow... they looked horrid. I only kept the most necessary ones.  So above is the 2 sides now complete with swivel clasps. I decided to keep it with shiny silver, since the zipper is very noticeable in the same metal. The raw edges where I cut the strap were bright, so I colored them brown with a marker, and now they blend right in.


I used an awl to pre punch holes for sewing, and the strap is so thin that snaps or rivets are unreasonable, so I had to sew everything - which still wasn't that much at all. I used these pins to help keep the holes lined up while I was stitching them together.


This is the finished cross body strap, which I honestly don't see myself using very often, and the three, yes, 3, needles that snapped while stitching these together. I pre punched the holes! ARGH! 


Here is the finished bag, hanging on my belt loops! It even looks fine with my favorite Wonder Woman belt. :)

All in all I am highly pleased. I will try and take some pictures in daylight, where you can see it better. 

As a side note, I was going to age the vinyl to try and make it look more like real leather, but found that the high texture of the material didn't lend itself well to that particular upgrade. I will have to get crafty and think of something...

Sunday, October 15, 2017

Bottle blues 2

New morning, and I'm finishing the project heck or high water. Or, more likely, eye strain.

Finally got the fabrics somewhat attached. Cut them out, as stated before, and came across yet another thing that the instructions just seemed to make too hard. It says to cut a tiny hole to attach the snaps. Tried that. I could cut through the vinyl, but the felt just shifted and slid out of the way.

My fix? Paper hole punch. Like butter, right through them both.  


Next was the sewing the openings - the top and bottom edges. The instructions say to edge stitch everything, but honestly, it looked like crap. So instead, I fiddled around with my sewing machine until I found a basting stitch I liked. I also learned that the felt wouldn't work on the bottom - the feed teeth just rubbed the felt, not pushing it through. I'm too used to having lining side down, it weird-ed me out, but I had to flip it so the vinyl side was down. You can see the basting on the picture below. Looks mighty fine, much better than the edge stitch. 

Handy trick #I-Lost-Track: When hammering in snaps, do it on an old cutting board that you don't care about too much. That way, you don't also hammer dents into your kitchen table. 

BTW, Sorry, honey. 


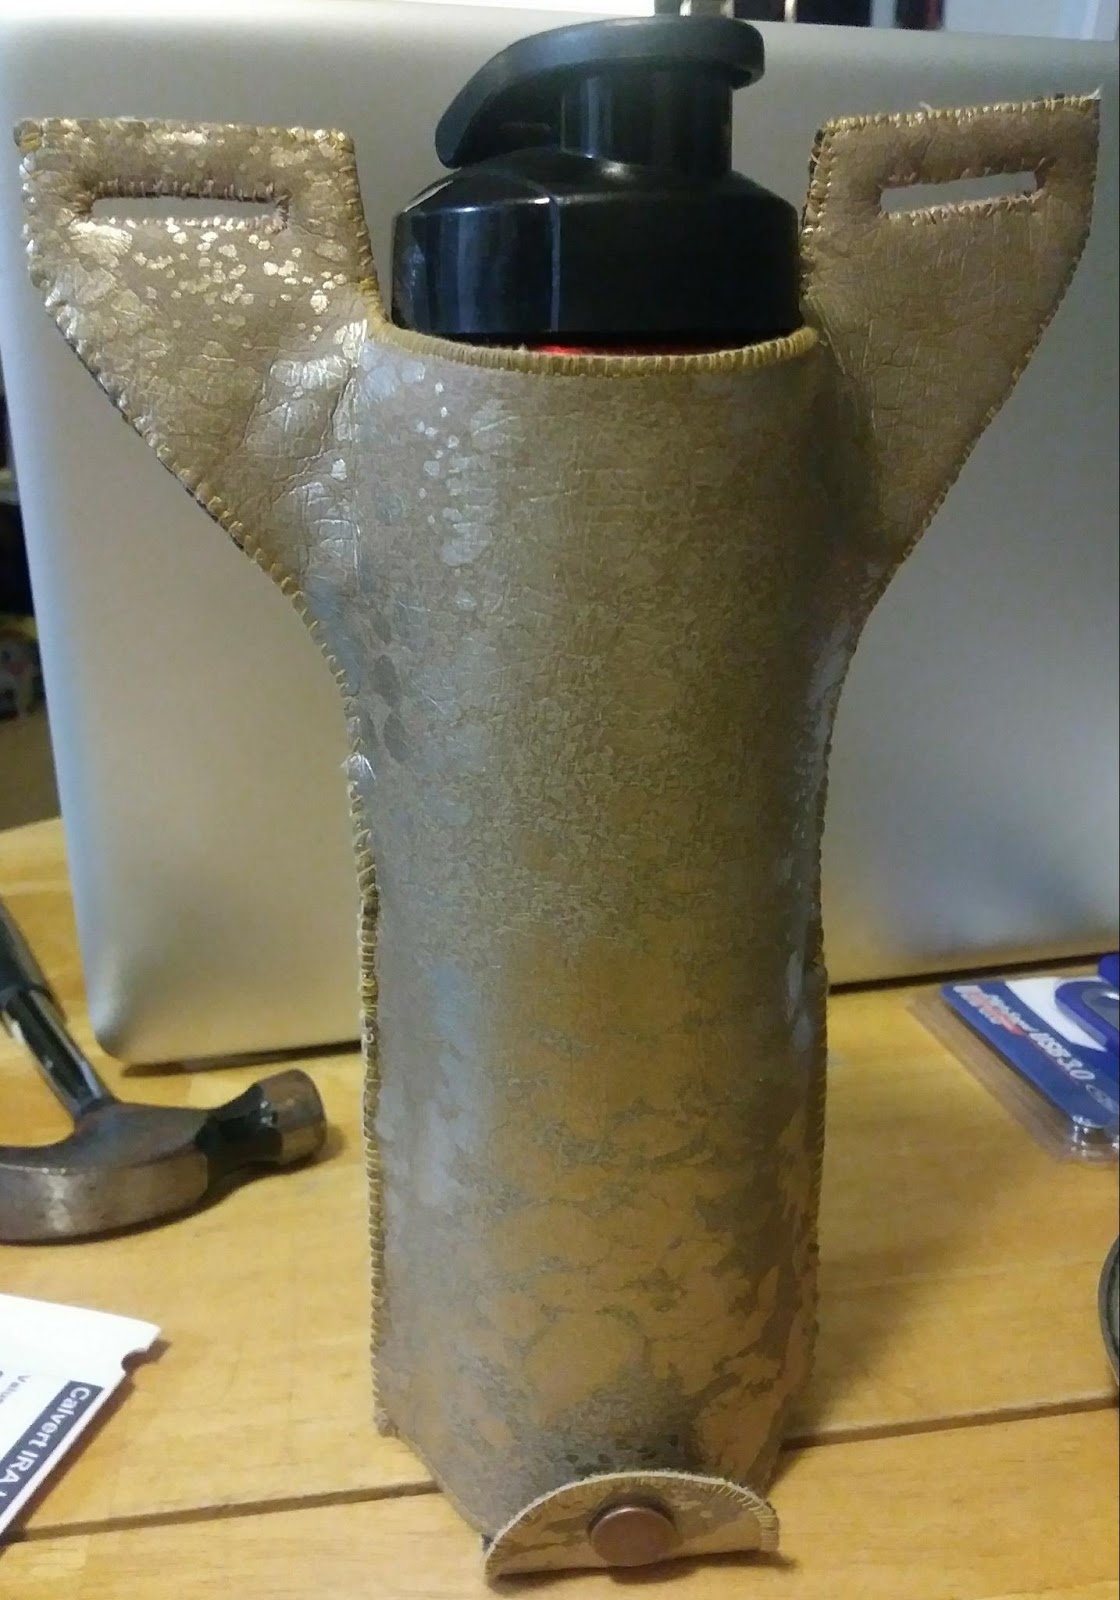
And here it is: your first view of THE MOST AWESOME REMNANT EVER. It's a tan leather like vinyl with a gold splatter pattern. I love it! I found snaps with an antique brass finish, and I had some old golden yellow thread I could use for the stitching. Looks pretty sweet, huh?

First time I've ever attached snaps to anything. I think it went fairly well. They survived my tests, anyway. 


I did the same stitching along the belt piece, black thread on one side, gold on the other. This picture shows how the light can play with the gold splatter, and how nice the stitching looks. It gives it a decent edge - the edge stitch kept the ends too raw. The basting really erases all the tiny imperfections my cutting left behind. 


Then the trouble started. 

The stitching that worked so well, and looked so good, when used on 2 layers of fabric, couldn't handle 4. I did everything I could think of. I tried it with pinning stitches. I tried using paperclips to hold things together, tried having thick scraps behind to level out the foot, I did everything I could think of to avoid it, but there was none. 

I had to hand stitch.

The whole bloody thing. Well past sunset. 

But, once it was finally together, I did a test with the bottle. I think it looks pretty good, if I do say so myself. :) 


I decided to not sew in the stitches on the sides by the handle. It makes sense for tapered bottles, like your standard plastic variety, but it didn't make sense for my non tapered bottle.

Remember before when I expressed that I had an evil plan involving the strap? First off, if you have the fabric, don't bother following the instructions and cutting out 2 pieces just to sew them together later. No one wants a seam in their shoulder if they can avoid it - just makes extra work. Second, the holes for the strap to go through, though reinforced, are not super huge. Plus, there is a large area where the strap will be 4 fabric thick, where it gets sewn together. So why not only have it 3 fabric thick? I left extra on either side of just the vinyl - the amount the pattern says for the fold and the attachment. I lined where the felt ended up with the top of the bag, folded over, and stitched the heck out of it. Still a finished end, but not as thick, so it moves through the opening easier.


Here it is! the final, finished product! 


This below is with the flash, really shows off the shine of the gold. :)


There you go! What do you think? I have plenty of THE MOST AWESOME REMNANT EVER to make another project of similar size, or even a bit larger. Thoughts? Suggestions?